


Informatica Cloud で SAP Business One のデータ を連携

Informatica Cloud は、クラウド上で抽出、変換、ロード(ETL)タスクを実行できるツールです。Cloud Secure Agent と CData JDBC Driver for SAP Business One を組み合わせることで、Informatica Cloud から直接 SAP Business One のデータ にリアルタイムでアクセスできます。本記事では、Cloud Secure Agent のダウンロードと登録、JDBC ドライバーを介した SAP Business One への接続、そして Informatica Cloud のプロセスで使用可能なマッピングの作成方法をご紹介します。
Informatica Cloud Secure Agent
JDBC ドライバー経由で SAP Business One のデータ に接続するには、Cloud Secure Agent をインストールします。
- Informatica Cloud の Administrator ページに移動します
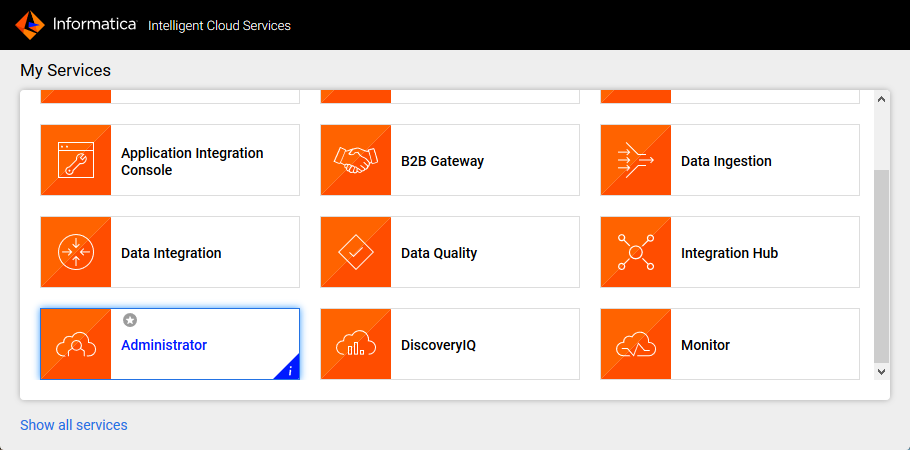
- Runtime Environments タブを選択します
- 「Download Secure Agent」をクリックします

- Install Token をメモしておきます
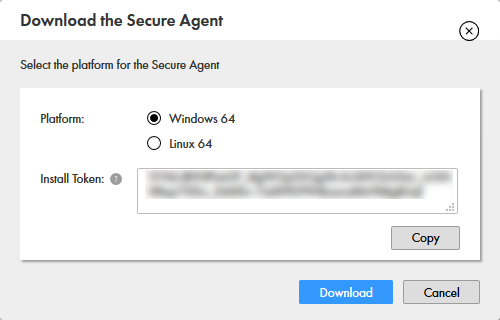
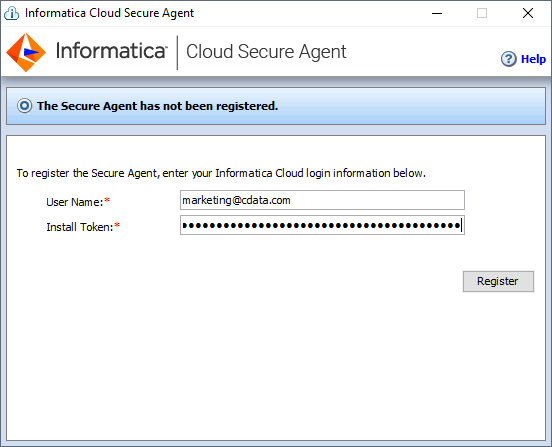
- クライアントマシンでインストーラを実行し、ユーザー名と Install Token を使って Cloud Secure Agent を登録します
NOTE: Cloud Secure Agent のすべてのサービスが起動するまでに、しばらく時間がかかる場合があります。
SAP Business One JDBC Driver への接続
Cloud Secure Agent のインストールと起動が完了したら、JDBC ドライバーを介して SAP Business One に接続する準備が整いました。
Secure Agent マシンへの JDBC ドライバーの追加
- Secure Agent マシンの以下のディレクトリに移動します:
%Secure Agent installation directory%/ext/connectors/thirdparty/
- 設定するマッピングの種類に応じて、フォルダを作成しドライバーの JAR ファイル(cdata.jdbc.sapbusinessone.jar)を追加します。
マッピングの場合は、以下のフォルダを作成してドライバーの JAR ファイルを追加します:
informatica.jdbc_v2/common
アドバンスドモードのマッピングの場合は、以下のフォルダも作成してドライバーの JAR ファイルを追加します:
informatica.jdbc_v2/spark
- Secure Agent を再起動します。
Informatica Cloud での SAP Business One への接続
ドライバーの JAR ファイルをインストールしたら、Informatica Cloud で SAP Business One への接続を設定します。Connections タブをクリックし、New Connection をクリックして、以下のプロパティを入力します:- Connection Name: 接続に名前を付けます(例:CData SAP Business One Connection)
- Type:「JDBC_V2」を選択します
- Runtime Environment: Secure Agent をインストールしたランタイム環境を選択します
- JDBC Driver Class Name: JDBC ドライバークラス名を入力します:cdata.jdbc.sapbusinessone.SAPBusinessOneDriver
- JDBC Connection URL: SAP Business One の JDBC URL を設定します。URL は以下のようになります:
jdbc:sapbusinessone:Url=http://localhost:50000/b1s/v1;User=username;Password=password;CompanyDB=dbname;
SAP Business One に認証するには、User およびPassword プロパティを指定する必要があります。
データに接続するには、Url を指定します。これは、SAP Business One Service Layer のルートURL です。組み込みの接続文字列デザイナー
JDBC URL の作成には、SAP Business One JDBC Driver に組み込まれている接続文字列デザイナーを使用できます。.jar ファイルをダブルクリックするか、コマンドラインから実行してください。
java -jar cdata.jdbc.sapbusinessone.jar接続プロパティを入力し、接続文字列をクリップボードにコピーします。
")
- Username: SAP Business One のユーザー名を設定します
- Password: SAP Business One のパスワードを設定します
")
SAP Business One のデータ のマッピングを作成
SAP Business One への接続を設定したら、Informatica の任意のプロセスで SAP Business One のデータ にアクセスできます。以下の手順では、SAP Business One から別のデータターゲットへのマッピングを作成する方法を説明します。
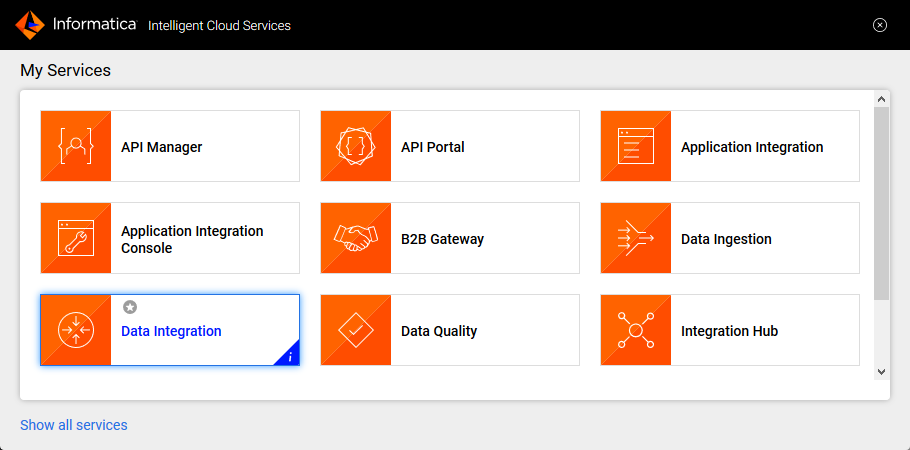
- Data Integration ページに移動します
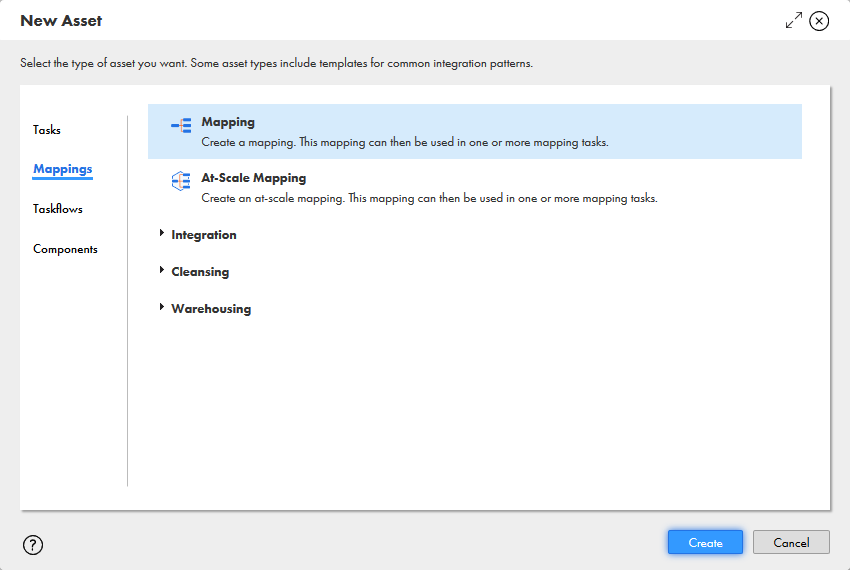
- New.. をクリックし、Mappings タブから Mapping を選択します
- Source Object をクリックし、Source タブで Connection を選択し、Source Type を設定します

- 「Select」をクリックして、マッピングするテーブルを選択します

- Fields タブで、マッピングする SAP Business One テーブルのフィールドを選択します

- Target オブジェクトをクリックし、Target ソース、テーブル、フィールドを設定します。Field Mapping タブで、ソースフィールドをターゲットフィールドにマッピングします。

マッピングの設定が完了すると、Informatica Cloud でサポートされている任意の接続先と SAP Business One のデータ のリアルタイム連携を開始できます。CData JDBC Driver for SAP Business One の30日間無償トライアルをダウンロードして、Informatica Cloud で SAP Business One のデータ の活用を今すぐ始めましょう。
はじめる準備はできましたか?
SAP Business One Driver の無料トライアルをダウンロードしてお試しください:
ダウンロード詳細:
SAP Business One の簡単なデータ連携開発。SAP Business One Accounts、Activities、Orders、Customers などに連携するJava アプリケーションを超高速で構築。